This is my first time exploring Nvidia DIGITS, and I am truly impressed. Indeed, it is awesome. The goal of this post is to explain how to set up Nvidia DIGITs on an AWS server and produce a basic model. I will be following the instructions available here. However, I think there are one or two misleading sentences in these instructions that I will try to clarify.
The first task is to create an AWS machine with Nvidia DIGITs pre-installed. Luckily this is pretty easy. Just go to https://developer.nvidia.com/digits and click on DIGITS AMI. Instructions are available at https://developer.nvidia.com/gpu-cloud-images.
Warning: Step 5 of the instructions suggests you go to the public IP address of the instance at port 34448 (e.g. http://10.1.2.3:34448/) to get the DIGITS UI. This did not work for me. After a half hour of frustration, I went to just the public IP address without ":34448", and I was able to successfully get the DIGITS UI.

The first step is to SSH into our AWS server just constructed. Use the following command:
ssh -i Desktop/Credentials/awsspace.pem ubuntu@ec2-54-204-174-235.compute-1.amazonaws.com
Here, "awsspace.pem" is the AWS Key-Pair I used when created the AWS server initially, and "54-204-174-235" is the Public IP address of my specific server, which you can find by logging into your AWS Mangement console and viewing the EC2 instance. Make sure your "awsspace.pem" has the right permissions!
Use the following command to download the MNIST data once you succesfully SSH'd into your AWS server:
$ python -m digits.download_data mnist ~/mnist
Downloading url=http://yann.lecun.com/exdb/mnist/train-images-idx3-ubyte.gz ...
Downloading url=http://yann.lecun.com/exdb/mnist/train-labels-idx1-ubyte.gz ...
Downloading url=http://yann.lecun.com/exdb/mnist/t10k-images-idx3-ubyte.gz ...
Downloading url=http://yann.lecun.com/exdb/mnist/t10k-labels-idx1-ubyte.gz ...
Uncompressing file=train-images-idx3-ubyte.gz ...
Uncompressing file=train-labels-idx1-ubyte.gz ...
Uncompressing file=t10k-images-idx3-ubyte.gz ...
Uncompressing file=t10k-labels-idx1-ubyte.gz ...
Reading labels from /home/username/mnist/train-labels.bin ...
Reading images from /home/username/mnist/train-images.bin ...
Reading labels from /home/username/mnist/test-labels.bin ...
Reading images from /home/username/mnist/test-images.bin ...
Dataset directory is created successfully at '/home/username/mnist'
Done after 16.722807169 seconds.
Now, in your DIGITS UI available at your Public IP, click on Datasets > New Dataset > Images > Classification. This will lead you to the login page, and you can login with a username of your choice.
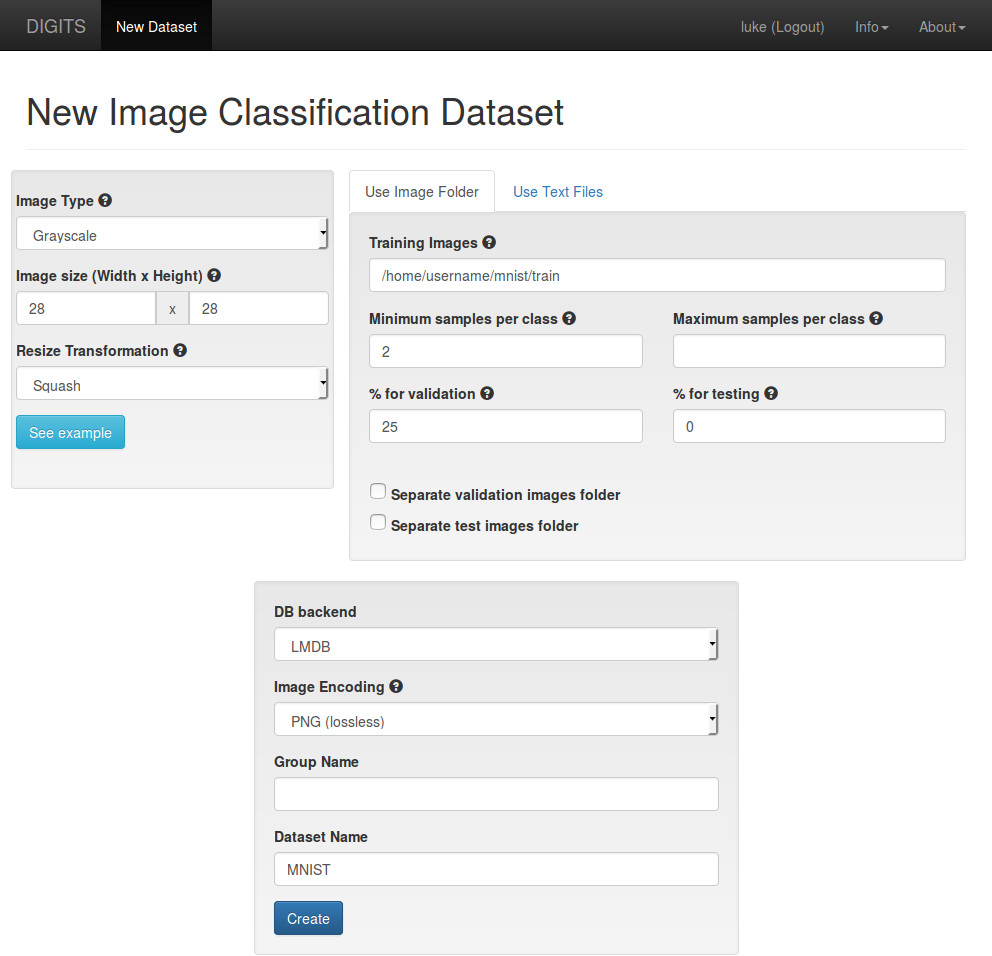
After logging in, you will be brought to the "New Image Classification Dataset" page.
- Type in the path to the MNIST training images
- Change the Image Type to Grayscale
- Change the Image size to 28 x 28
- Give the dataset a name
- Click on the Create button
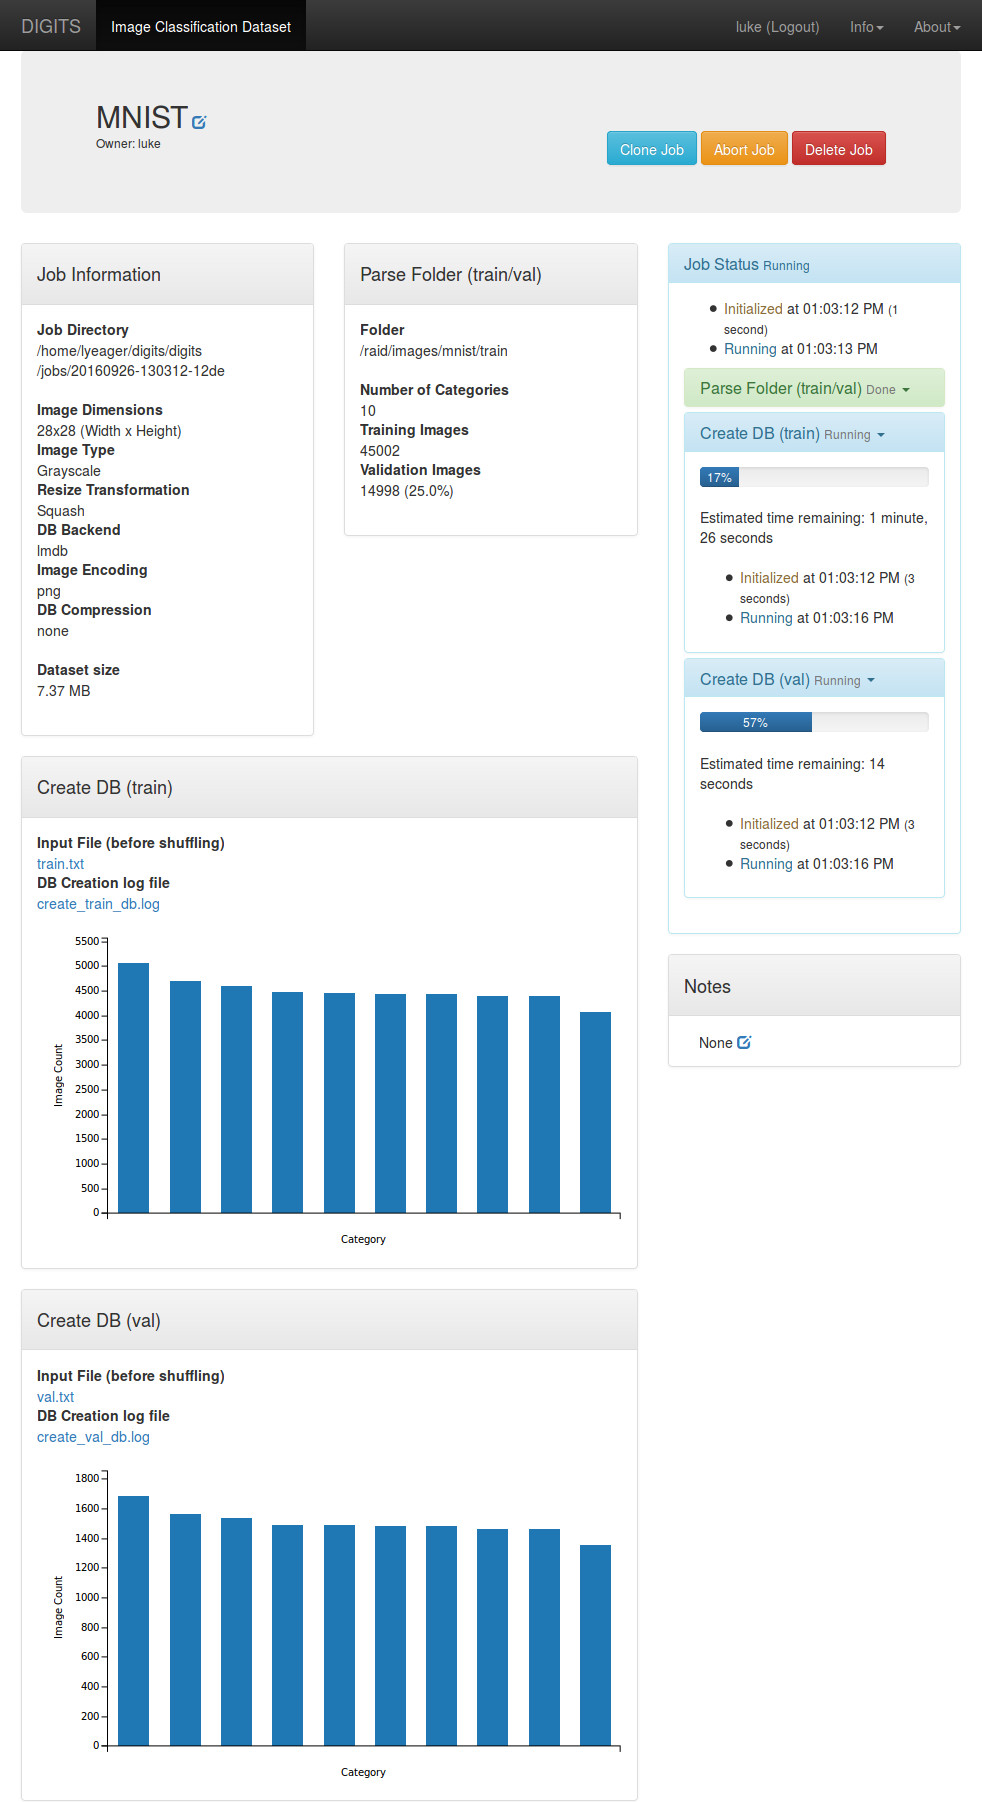
While the job is running, you should see the expected completion time on the right side:
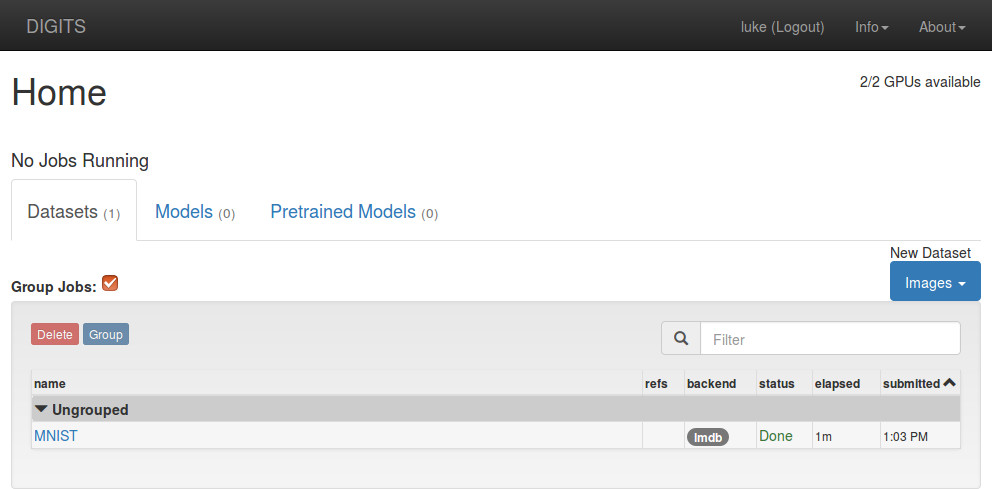
When the job is finished, go back to the home page by clicking `DIGITS` in the top left hand part of the page. You should now see your dataset listed under the "Datasets" tab.
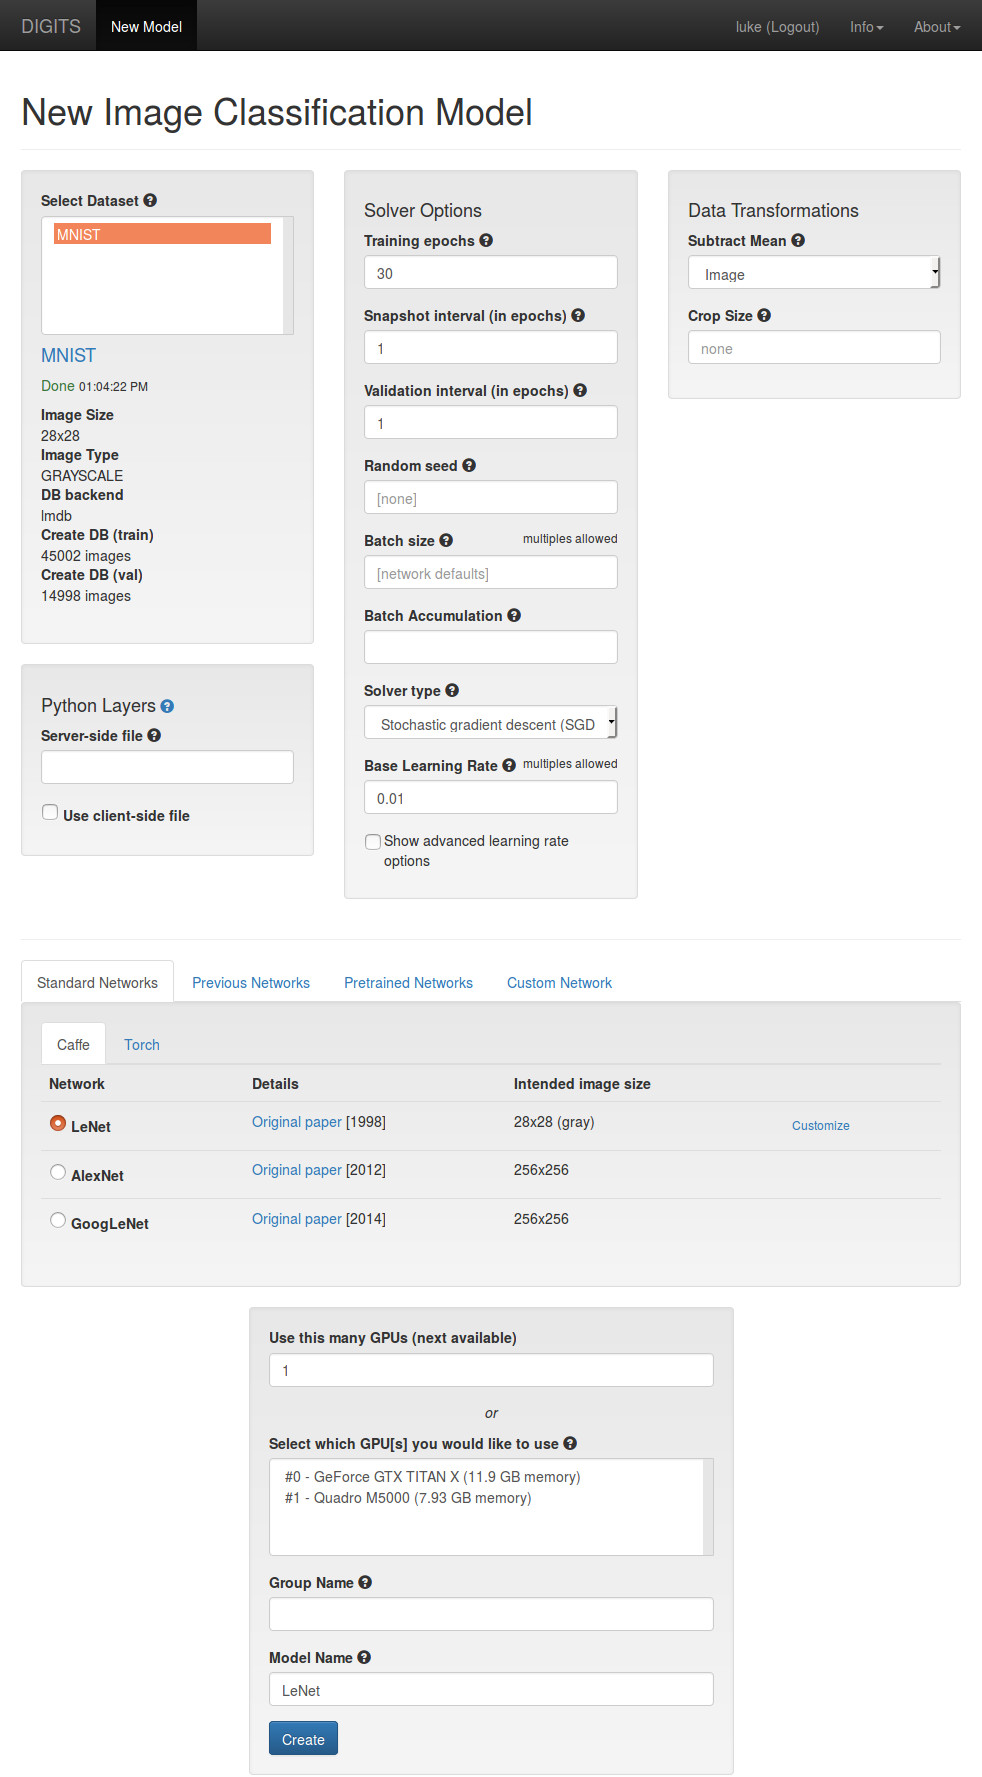
Click on `Models > New Model > Images > Classification`. This will lead you to the "New Image Classification Model" page. For this example, do the following:
- Choose the "MNIST" dataset in the `Select Dataset` field
- Choose the `LeNet` network in the `Standard Networks` tab
- Give the model a name
- Click on the `Create` button
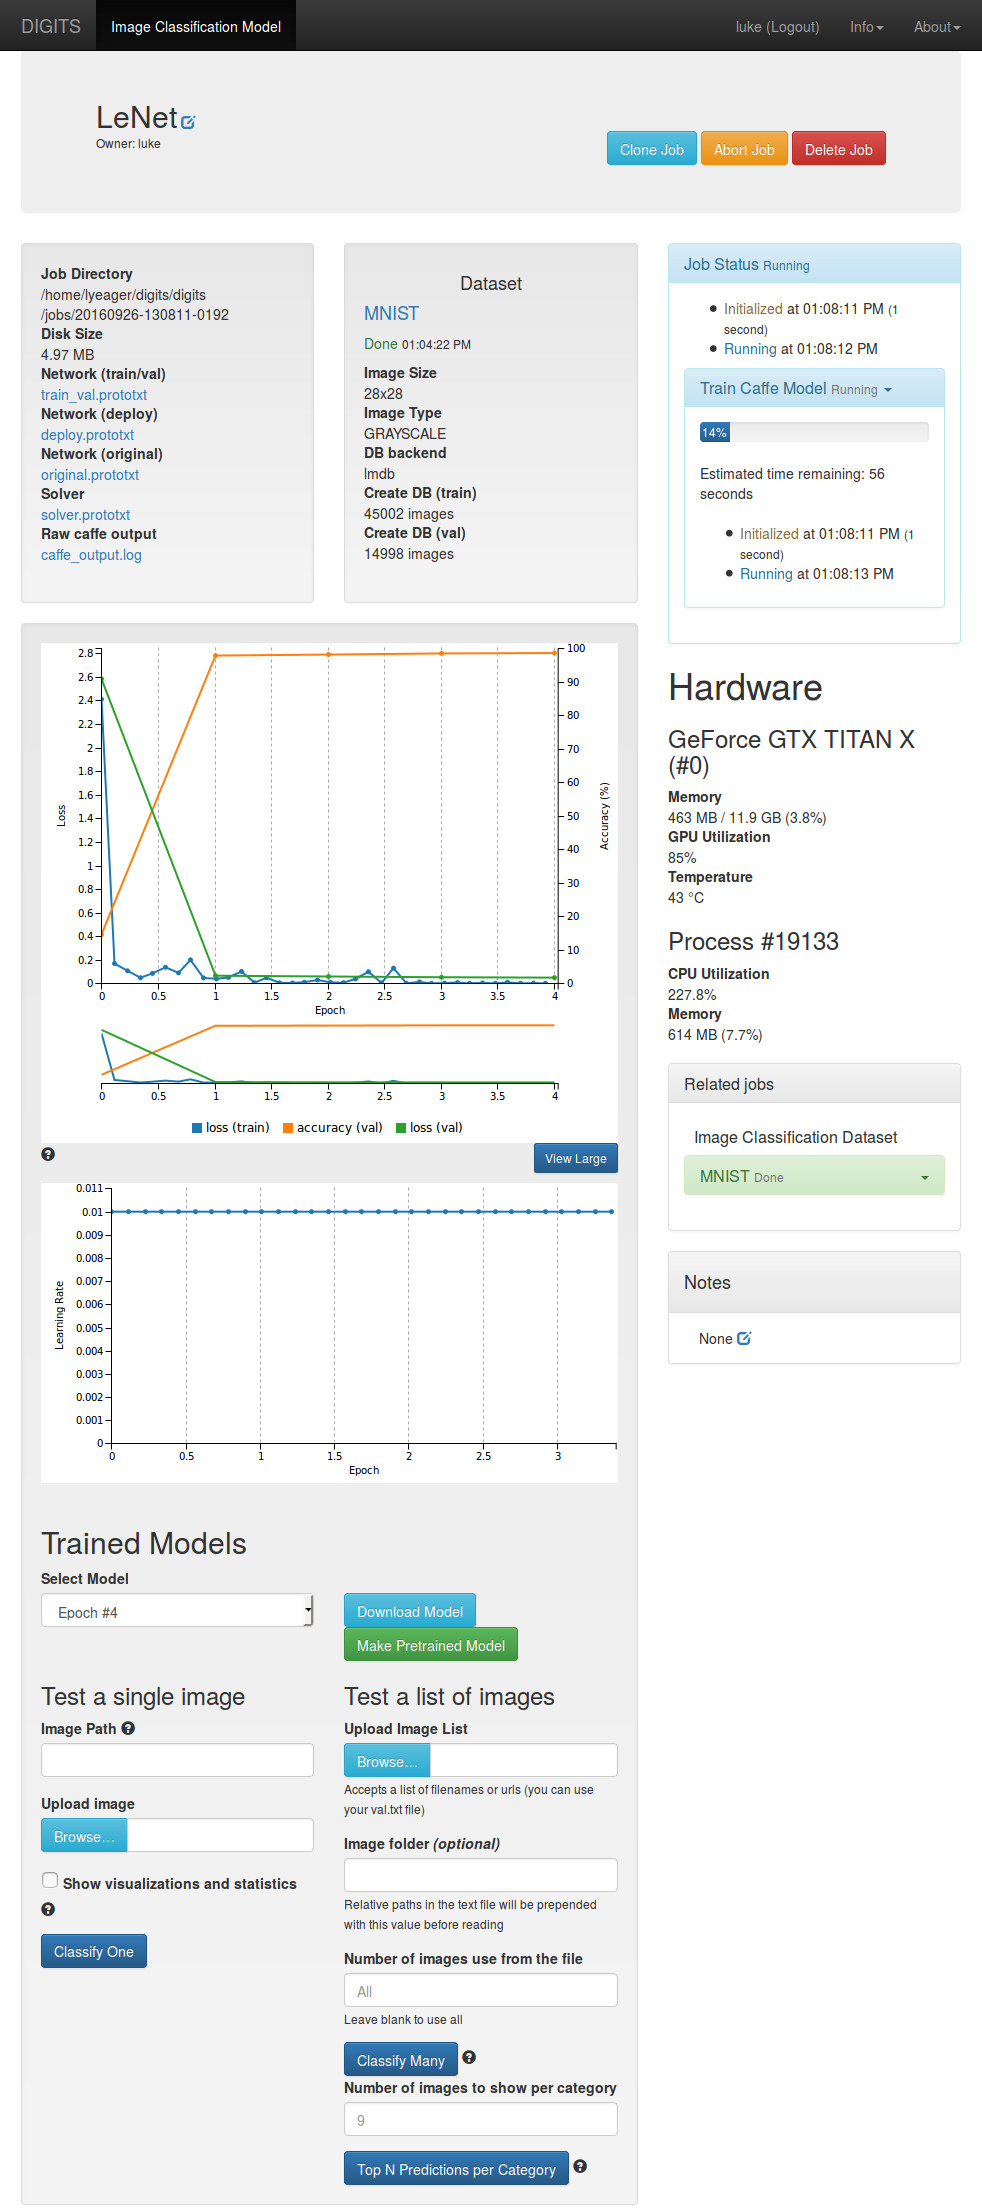
While training the model, you should see the expected completion time on the right side:
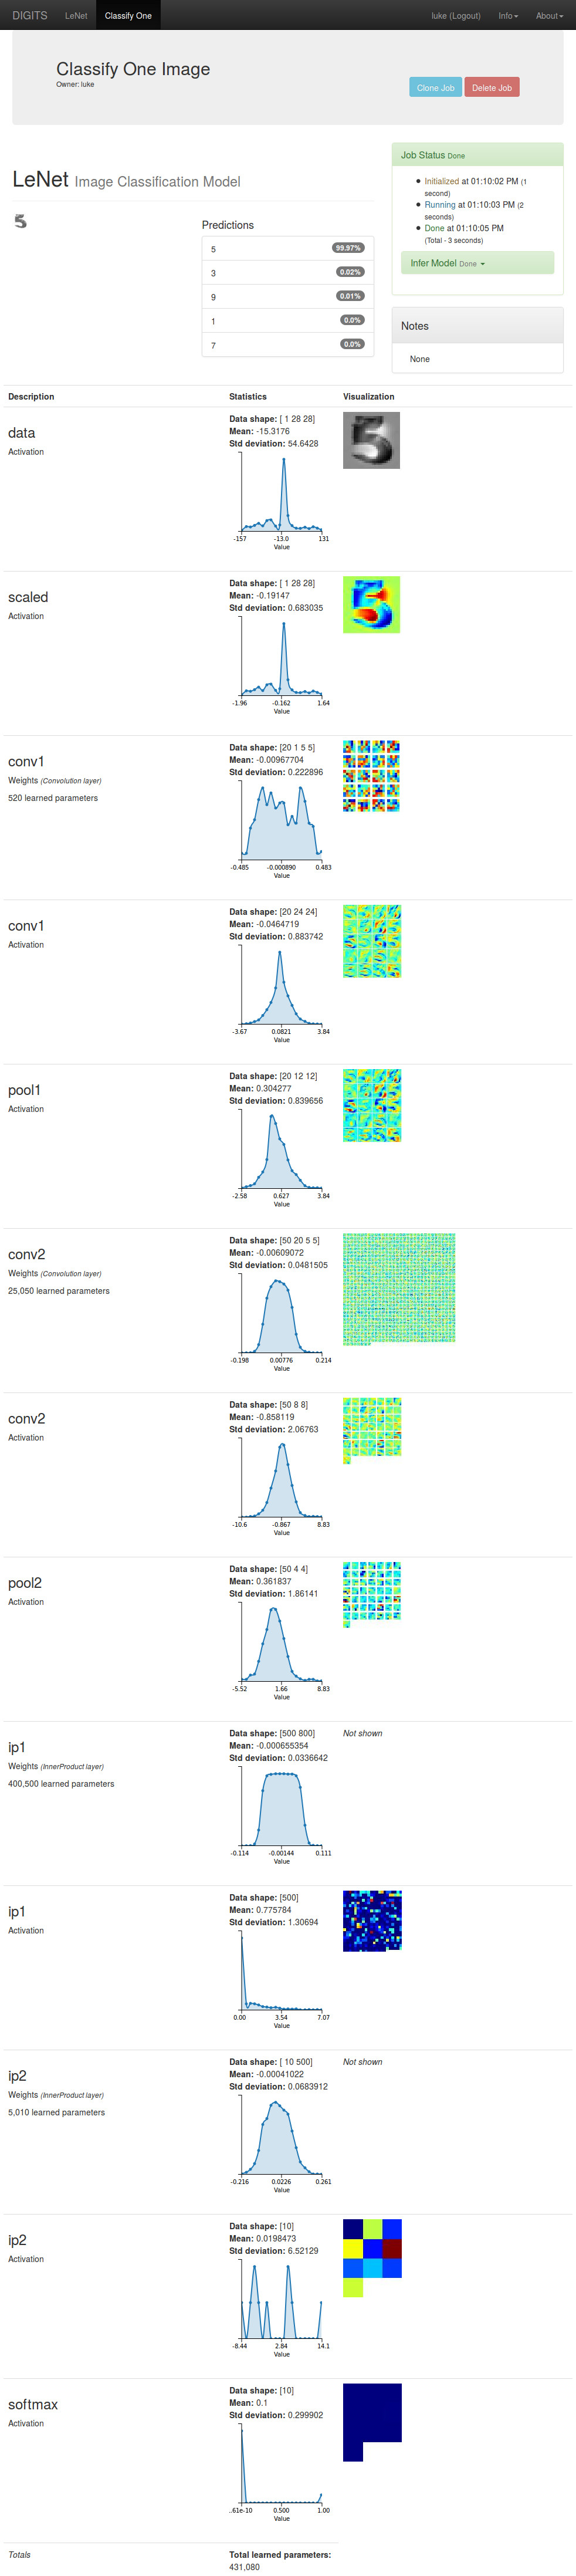
To test the model, scroll to the bottom of the page.
- Click on the `Upload image` button and choose a file
- There are plenty to choose from in `/home/username/mnist/test/`
- Or, find an image on the web and paste the URL into the `Image URL` field
- Check the `Show visualizations and statistics` box
- Click on `Classify One`
At the top of the page, DIGITS displays the top five classifications and corresponding confidence values. DIGITS also provides visualizations and statistics about the weights and activations of each layer in your network.
That's it for a first run with Nvidia DIGITS.